Indledning
Thank you for choosing the Fischer 18090 Bicycle Carrier Rack. This tow bar mounted carrier is designed for secure and convenient transport of bicycles, including electric bikes. It features a quick-release mechanism for tool-free assembly, a locking function for security, and can be folded for compact storage. This manual provides detailed instructions for setup, operation, maintenance, and troubleshooting to ensure safe and optimal use of your bicycle carrier.

Figure 1: The Fischer 18090 Bicycle Carrier Rack. This image shows the overall design of the carrier, ready for installation on a vehicle's tow bar.
Nøglefunktioner:
- Designed for electric bikes.
- Carrier can be locked for security.
- Quick-release mechanism for tool-free assembly.
- Manufactured in the EU.
- Carrier can be folded for compact storage.
Opsætning og installation
Proper installation is crucial for the safety of your bicycles and vehicle. Follow these steps carefully.
1. Attaching to the Tow Bar
Position the carrier onto your vehicle's tow bar. The quick-release mechanism allows for easy, tool-free attachment. Ensure the carrier is firmly seated and secured before proceeding.

Figure 2: The bicycle carrier rack mounted on the tow bar of a vehicle. This image illustrates the carrier's position when correctly installed on the vehicle.

Figure 3: Close-up of a hand engaging the quick-release lever. This mechanism allows for rapid and secure attachment or detachment of the carrier without the need for additional tools.
2. Securing the Carrier
Once attached, lock the carrier to the tow bar using the integrated locking mechanism and key for added security against theft.

Figure 4: A hand inserting a key into the locking mechanism of the carrier. This feature provides security, preventing unauthorized removal of the carrier from the tow bar.
3. Elektrisk tilslutning
Connect the carrier's electrical plug to your vehicle's tow bar socket. This powers the integrated tail lights, brake lights, and turn signals on the carrier, ensuring road safety and compliance.

Figure 5: The electrical plug of the carrier connected to the vehicle's tow bar socket. This connection ensures that the carrier's lights function in sync with the vehicle's lighting system.

Figur 6: En detaljeret view of the electrical plug securely inserted into the vehicle's receptacle. A proper connection is vital for the functionality of the carrier's integrated lighting.

Figure 7: Close-up of the carrier's rear light assembly. These lights replicate the vehicle's tail, brake, and turn signals, ensuring visibility and safety on the road.
Betjeningsvejledning
Learn how to safely load and transport your bicycles using the Fischer 18090 carrier.
1. Læsning af cykler
Place your bicycles onto the carrier's rails. Secure the wheels using the adjustable straps provided. For the bicycle frame, use the adjustable clamps to firmly hold the frame in place. Ensure bikes are balanced and do not exceed the carrier's weight limit.

Figure 8: The bicycle carrier with two bicycles securely loaded. This demonstrates the capacity and how bikes are positioned on the rack.

Figure 9: A person in the process of loading a bicycle onto the carrier. This highlights the ease of placing bikes onto the rack.

Figur 10: En detaljeret view of a bicycle wheel secured by an adjustable strap on the carrier's rail. These straps prevent the wheels from moving during transit.

Figure 11: A bicycle frame secured by an adjustable clampDisse clamps provide stability and prevent the bicycle from swaying during transport.

Figure 12: An alternative angle showing a bicycle frame secured by a clamp, emphasizing the robust attachment.
2. Tilting Function for Trunk Access
The carrier features a tilt function, allowing you to access your vehicle's trunk even with bicycles loaded. Operate the tilt mechanism carefully to lower the carrier away from the vehicle.
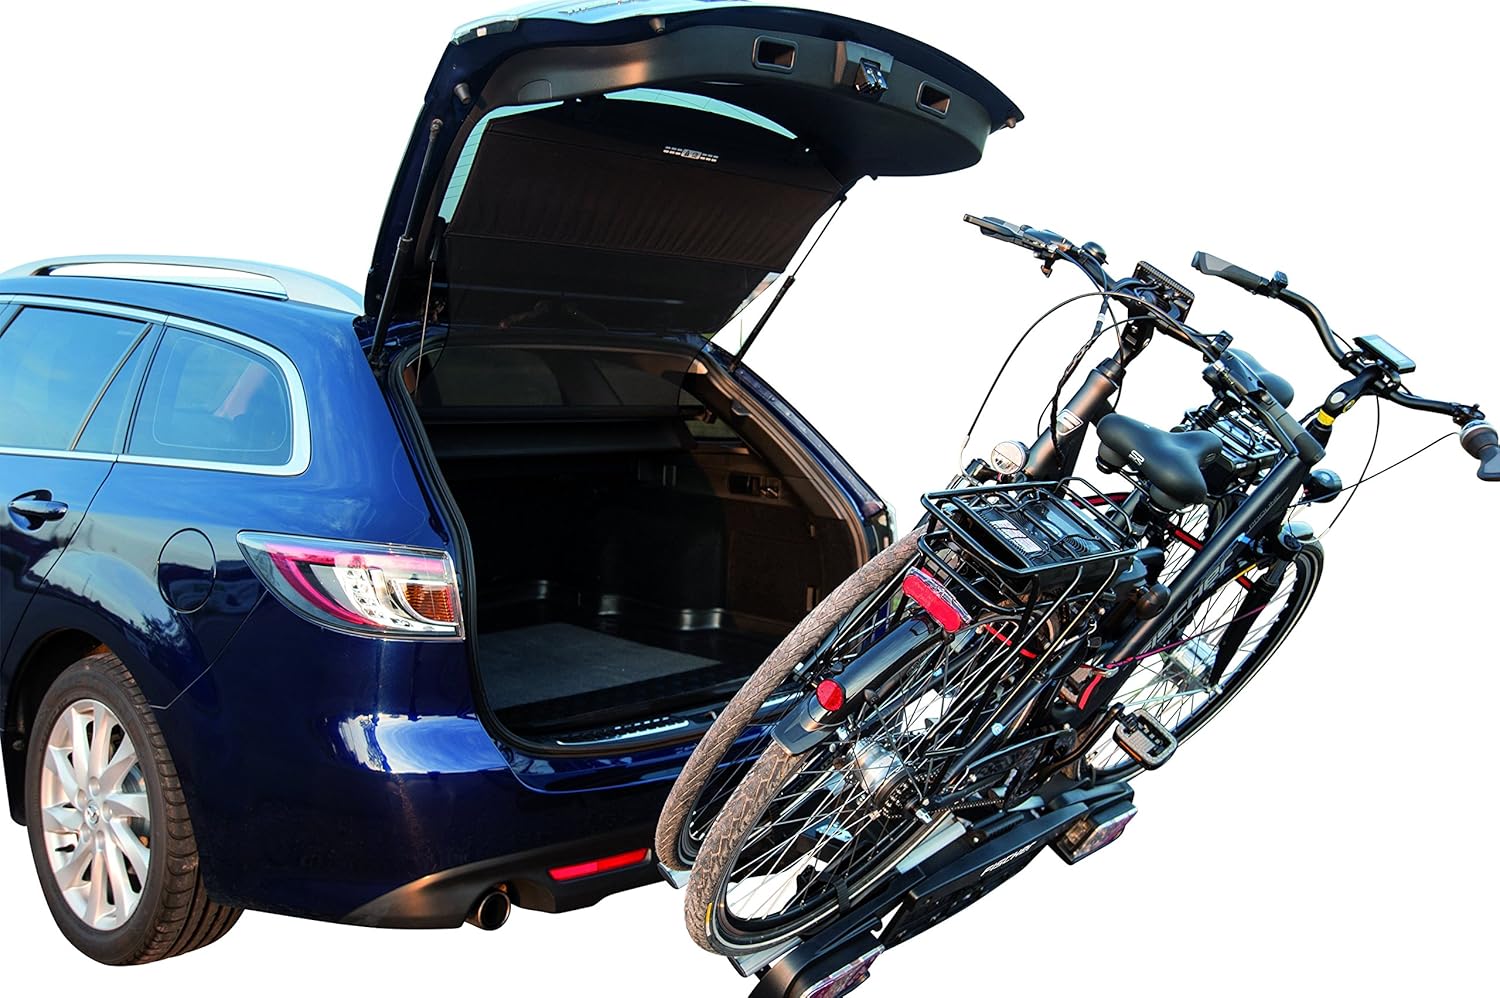
Figure 13: The bicycle carrier in its tilted position, providing clear access to the vehicle's trunk. This feature is convenient for retrieving items without unloading the bikes.
3. Foldning til opbevaring
When not in use, the carrier can be folded for compact storage. This feature makes it easier to store in a garage or shed.

Figure 14: A close-up of the carrier's folding mechanism. This design allows the rack to be collapsed for more convenient storage when not in use.
Opretholdelse
Regular maintenance ensures the longevity and safe operation of your Fischer 18090 Bicycle Carrier Rack.
- Rensning: Rengør bæreren regelmæssigt med mild sæbe og vand, især efter udsættelse for snavs, salt eller barske vejrforhold. Skyl grundigt og tør.
- Smøring: Periodically lubricate moving parts, such as hinges and locking mechanisms, with a suitable lubricant to ensure smooth operation.
- Inspektion: Before each use, inspect all straps, clamps, bolts, and the tow bar connection for signs of wear, damage, or looseness. Ensure all components are securely fastened.
- Elektriske forbindelser: Check the electrical plug and socket for corrosion or damage. Keep contacts clean and dry.
- Opbevaring: Store the carrier in a dry, protected area when not in use to prevent rust and damage.
Fejlfinding
This section addresses common issues you might encounter with your bicycle carrier.
| Problem | Mulig årsag | Løsning |
|---|---|---|
| Carrier lights not working. |
|
|
| Carrier feels unstable on tow bar. |
|
|
| Bicycles are swaying during transport. |
|
|
Specifikationer
Detailed technical specifications for the Fischer 18090 Bicycle Carrier Rack.
| Attribut | Værdi |
|---|---|
| Fabrikant | Fischer |
| Mærke | Fischer |
| Model | 18090 |
| Varens vægt | 15.2 kilo |
| Pakkedimensioner | 123 x 50 x 24 cm |
| Producentens varenummer | 18090 |
| ASIN | B00TYL2V12 |
| Global Trade Identification Number (GTIN) | 04008153180903 |
| Første ledige dato | 22. juni 2015 |
Garantioplysninger
Fischer products are manufactured to high standards. For specific warranty terms and conditions, please refer to the documentation included with your purchase or visit the official Fischer webTypisk dækker en begrænset garanti fabrikationsfejl i en bestemt periode fra købsdatoen.
Gem venligst din købsbevis i tilfælde af garantikrav.
Kundesupport
Should you require assistance with your Fischer 18090 Bicycle Carrier Rack, please contact Fischer customer support. For the most up-to-date contact information, please visit the official Fischer webwebstedet eller se kontaktoplysningerne på din produktemballage.
Når du kontakter support, bedes du have dit produktmodelnummer (18090) og købsbevis klar.