Indledning
Tak for købetasing the Soundmaster DAB500SI Portable Digital Radio. This manual provides essential information for the safe and efficient operation of your device. Please read it thoroughly before use and retain it for future reference.
Produkt overview
The Soundmaster DAB500SI is a compact and versatile digital radio, offering both DAB/DAB+ and FM reception. It features a clear display, intuitive controls, and a headphone output for personal listening. Its portable design allows for use in various locations.
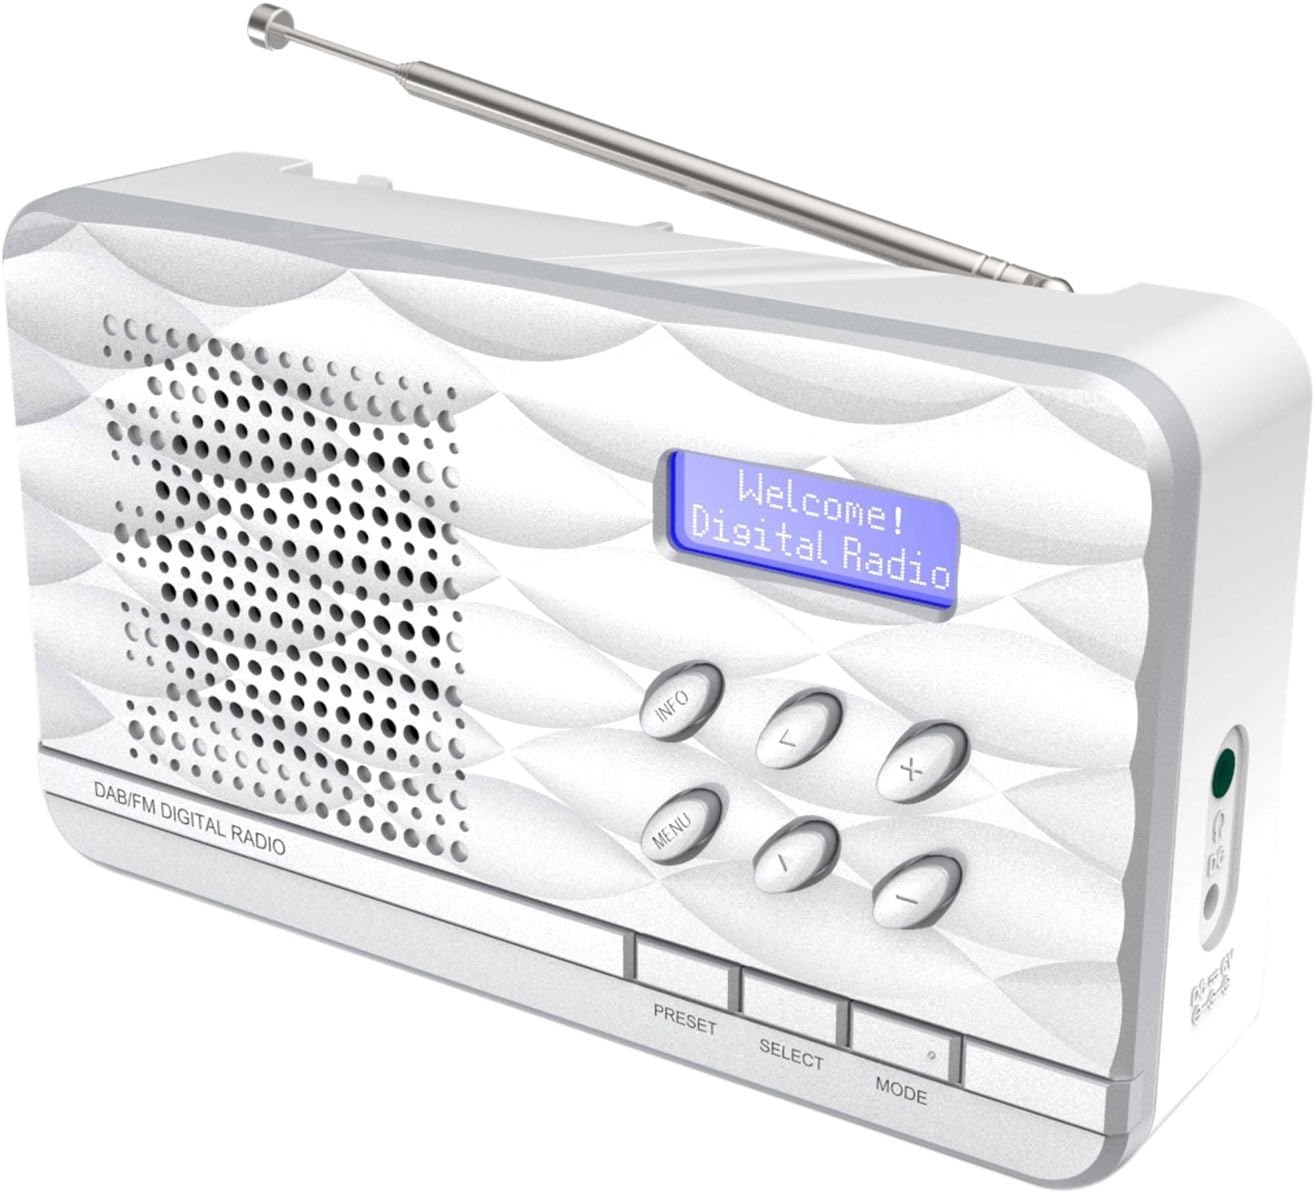
Figur 1: Soundmaster DAB500SI Portable Digital Radio. The image shows the silver radio with its extendable antenna, front speaker grille, blue backlit display showing "Welcome! Digital Radio", and control buttons labeled INFO, MENU, PRESET, SELECT, MODE, and navigation arrows. Dimensions are indicated as 19cm (width), 11cm (height), and 7cm (depth).
Opsætning
1. Udpakning
Carefully remove the radio from its packaging. Ensure all components are present: the DAB500SI radio unit and this user manual.
2. Strømtilslutning
The DAB500SI is powered by mains electricity. Locate the DC IN port on the side of the unit. Connect the provided power adapter to this port and then plug it into a standard wall outlet.
Alternatively, the unit can be powered by 4x AA batteries (not included) for portable use. Open the battery compartment on the rear of the unit and insert the batteries, observing correct polarity.
3. Justering af antenne
Extend the telescopic antenna fully for optimal DAB/DAB+ and FM reception. Adjust its position to achieve the best signal quality.
Betjeningsvejledning
1. Tænd/sluk
Tryk på MAGT button (usually combined with the MODE button or a dedicated button) to turn the radio on or off.
2. Valg af tilstand (DAB/FM)
Tryk på MODE button to switch between DAB/DAB+ and FM radio modes.
3. DAB/DAB+ radiobetjening
- Første gangs opsætning: When first powered on in DAB mode, the radio will automatically perform a full scan for available stations. This may take a few minutes.
- Stationsvalg: Brug VENSTRE/HØJRE navigation buttons (labeled < and > on the device) to browse through the list of available DAB stations. Press VÆLGE for at bekræfte dit valg.
- Manuel scanning: If you move the radio to a new location or wish to update the station list, press MENU, then navigate to "Full Scan" or "Auto Scan" and press VÆLGE.
- Informationsdisplay: Tryk på INFO button repeatedly to cycle through various information displays such as program type, signal strength, time, date, and DLS (Dynamic Label Segment) text.
4. Betjening af FM-radio
- Automatisk scanning: I FM-tilstand skal du trykke på og holde nede VÆLGE button to perform an auto scan. The radio will scan and store available stations.
- Manuel indstilling: Brug VENSTRE/HØJRE navigation buttons (labeled < and > on the device) to manually tune the frequency in small increments.
- RDS-oplysninger: If available, RDS (Radio Data System) information such as station name and program type will be displayed. Press INFO for at gennemgå tilgængelige RDS-data.
5. Forudindstillinger
The radio supports up to 20 preset stations for both DAB and FM modes.
- Storing a Preset: Stil ind på den ønskede station. Tryk og hold nede FORUDINDSTILLING button until "Preset Store" appears on the display. Use the navigation buttons to select a preset number (1-20) and press VÆLGE for at bekræfte.
- Genkaldelse af en forudindstilling: Tryk på FORUDINDSTILLING button briefly. Use the navigation buttons to select the desired preset number and press VÆLGE at tune ind på det.
6. Lydstyrkekontrol
Brug +/- buttons (labeled + and - on the device) to adjust the volume level.
7. Brug af hovedtelefoner
Connect standard 3.5mm headphones to the headphone jack on the side of the unit for private listening. The internal speaker will be muted automatically.
Opretholdelse
1. Rensning
Wipe the radio with a soft, dry cloth. Do not use abrasive cleaners, waxes, or solvents as they may damage the finish. Ensure the unit is unplugged before cleaning.
2. Opbevaring
Hvis radioen opbevares i længere tid, skal batterierne fjernes for at forhindre lækage. Opbevares køligt og tørt, væk fra direkte sollys og ekstreme temperaturer.
3. Udskiftning af batteri
When using batteries, replace all four AA batteries simultaneously when the low battery indicator appears or audio quality degrades. Ensure correct polarity when inserting new batteries.
Fejlfinding
| Problem | Mulig årsag | Løsning |
|---|---|---|
| Ingen strøm | Strømadapteren er ikke tilsluttet eller defekt; batterierne er opbrugt eller er isat forkert. | Check power adapter connection and wall outlet. Replace batteries, ensuring correct polarity. |
| Dårlig DAB/FM-modtagelse | Antennen er ikke strakt ud eller er dårligt placeret; område med svagt signal. | Fully extend and adjust the telescopic antenna. Try repositioning the radio. Perform a full scan in DAB mode. |
| Ingen lyd fra højttaleren | Lydstyrken er for lav; hovedtelefoner er tilsluttet. | Increase volume. Disconnect headphones if not desired. |
| Radioen fryser eller reagerer ikke | Midlertidig softwarefejl. | Afbryd strømmen i et par sekunder, og tilslut den derefter igen. Hvis du bruger batterier, skal du fjerne dem og sætte dem i igen. |
Specifikationer
- Modelnummer: DAB500SI
- Mærke: Soundmaster
- Understøttede radiobånd: AM, DAB, DAB+, FM
- Forudindstillede stationer: 20 (DAB/FM)
- Maksimal højttalerudgangseffekt: 1 watt
- Forbindelse teknologi: Auxiliary (3.5 mm hovedtelefonstik)
- Strømkilde: Mains (AC adapter) or 4x AA Batteries (not included)
- Vise: Baggrundsbelyst LCD
- Varens vægt: 400 gram
- Dimensioner (ca.): 19 cm (Bredde) x 11 cm (Højde) x 7 cm (Dybde)
- Farve: Sølv
- Inkluderede komponenter: Radio unit, User Manual
Garanti og support
Garantioplysninger
Please refer to the warranty card included with your product for detailed warranty terms and conditions. Keep your purchase receipt as proof of purchase for any warranty claims.
Kundesupport
For technical assistance, troubleshooting, or spare parts inquiries, please contact your retailer or the Soundmaster customer service department. Contact details can typically be found on the manufacturer's official webwebstedet eller på produktemballagen.
Note: Spare parts availability information is not provided by the manufacturer. Software updates are not guaranteed.