1. Introduktion
This user manual provides essential information for the safe and efficient installation, operation, and maintenance of your Supermicro YM-5201D ATX & EPS12V Power Supply. Please read this manual thoroughly before using the product to ensure proper functionality and to prevent damage.

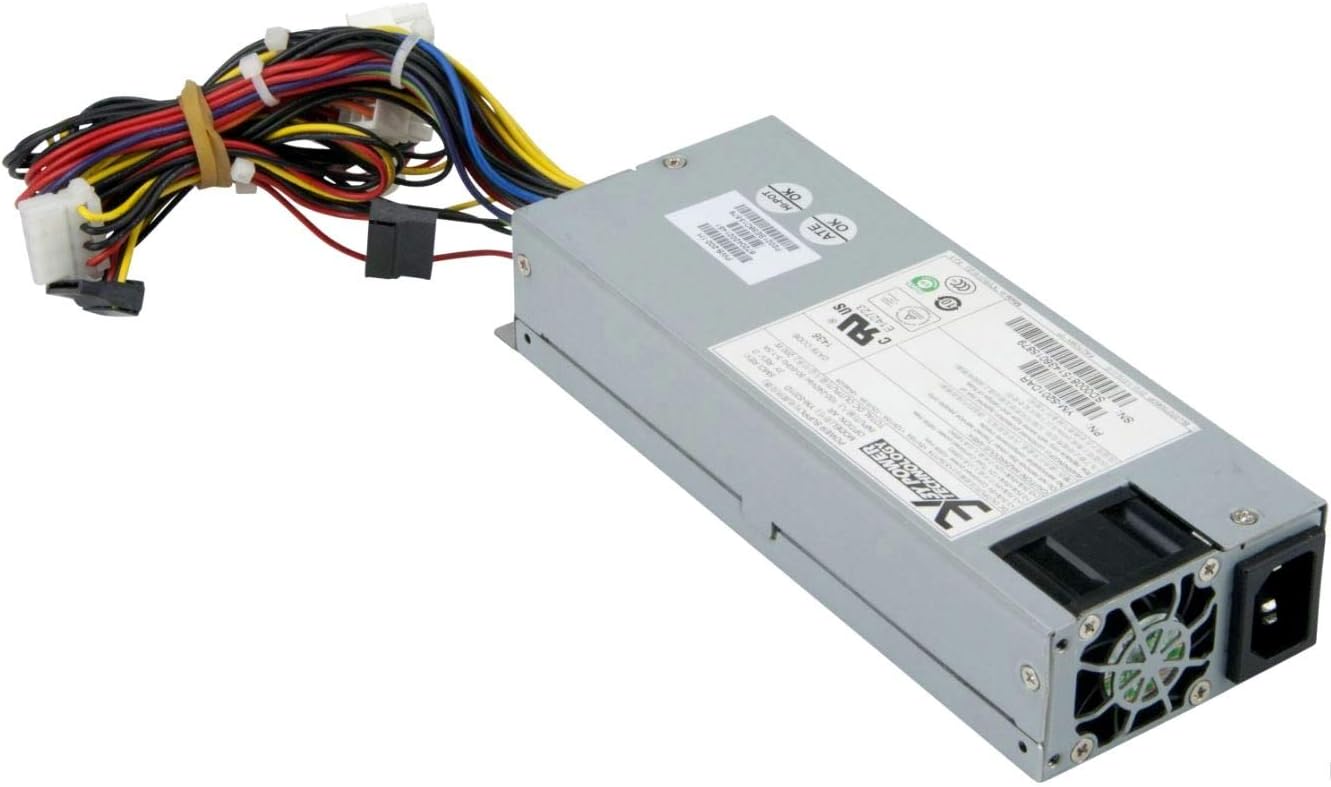
Figure 1: Supermicro YM-5201D ATX & EPS12V Power Supply, showing the main unit and attached power cables.
2. Sikkerhedsoplysninger
Overhold altid følgende sikkerhedsforanstaltninger for at forhindre personskade eller beskadigelse af strømforsyningen og tilsluttede komponenter:
- Ensure the power supply is disconnected from the AC outlet before installation or removal.
- Åbn ikke strømforsyningen casing. There are no user-serviceable parts inside, and opening it voids the warranty and exposes you to dangerous voltages.
- Installer strømforsyningen i et godt ventileret område for at forhindre overophedning.
- Use only the cables provided or approved by Supermicro for this power supply.
- Undgå at udsætte strømforsyningen for fugt eller ekstreme temperaturer.
- Ensure proper grounding of the computer system.
3. Pakkens indhold
Bekræft at alle varer er til stede i pakken:
- Supermicro YM-5201D ATX & EPS12V Power Supply
- AC Power Cord (region specific)
- Monteringsskruer
- Brugervejledning (dette dokument)
4. Opsætning og installation
Follow these steps to install the power supply into your computer chassis:
- Forbered systemet: Disconnect the computer from the AC power outlet. Open the computer case according to its manufacturer's instructions.
- Fjern den gamle strømforsyning (hvis relevant): Unscrew and remove the existing power supply. Disconnect all power cables from the motherboard, graphics card, drives, and other components.
- Installer ny strømforsyning: Carefully slide the Supermicro YM-5201D power supply into the designated power supply bay in your chassis. Ensure the fan is oriented correctly for optimal airflow (typically facing downwards or towards the rear vent).
- Secure the Power Supply: Align the screw holes on the power supply with those on the chassis. Secure the power supply using the provided mounting screws.
- Tilslut kabler:
- 24-pin ATX Motherboard Connector: Connect the large 24-pin connector to the corresponding port on your motherboard. Ensure it clicks into place.
- 8-pin (4+4) EPS12V CPU Connector: Connect the 8-pin or split 4+4-pin connector to the CPU power port on your motherboard.
- PCIe Connectors (if applicable): If your graphics card requires additional power, connect the appropriate 6-pin or 8-pin PCIe power connectors.
- SATA strømstik: Tilslut SATA-strømkabler til dine harddiske, SSD'er og optiske drev.
- Molex Connectors (if applicable): Connect Molex power cables to any legacy devices or case fans that require them.
- Kabelstyring: Før kablerne pænt for at forbedre luftgennemstrømningen og æstetikken i kabinettet.
- Luk chassis: Once all connections are secure, close the computer case.
- Tilslut vekselstrøm: Connect the AC power cord to the power supply's inlet and then to a grounded wall outlet or surge protector.
Figur 2: Bagside view of the Supermicro YM-5201D Power Supply, highlighting the cooling fan and AC power input.
5. Betjeningsvejledning
After successful installation, operating the power supply is straightforward:
- Tænd: Ensure the power switch on the rear of the power supply (if present) is in the 'ON' (I) position. Then, press the power button on your computer case.
- Sluk: Shut down your computer through the operating system. Once the system is off, you can flip the power switch on the power supply to the 'OFF' (O) position for complete power disconnection.
- Normal drift: The power supply will automatically regulate power delivery to your components based on demand. Ensure adequate ventilation around your computer to prevent heat buildup.
6. Vedligeholdelse
Regular maintenance helps prolong the life of your power supply:
- Fjernelse af støv: Periodically (e.g., every 3-6 months), disconnect the power supply from the AC outlet and use compressed air to gently blow dust out of the power supply's fan and vents. Do not open the casing.
- Kabelinspektion: Occasionally check all power cables for any signs of wear, fraying, or loose connections.
- Ventilation: Ensure that the computer case's ventilation openings are not obstructed.
7. Fejlfinding
Hvis du støder på problemer, kan du se følgende almindelige problemer og løsninger:
| Problem | Mulig årsag | Løsning |
|---|---|---|
| Computeren tænder ikke. | Power cable loose; Power switch off; Faulty component; Insufficient power. | Check AC power cord connection. Ensure power supply switch is ON. Verify all internal power connections (24-pin, 8-pin CPU). Test with minimal components. |
| Systemet tænder, men lukker ned med det samme. | Overload; Overheating; Short circuit. | Sørg for totalt wattage draw is within PSU limits. Check for proper ventilation. Inspect for any loose screws or components that might be causing a short. |
| Høj blæserstøj fra strømforsyningen. | Dust buildup; Fan bearing issue; High load. | Clean dust from fan and vents using compressed air. If noise persists and is excessive, consider professional inspection. |
If troubleshooting steps do not resolve the issue, contact Supermicro technical support.
8. Specifikationer
Key technical specifications for the Supermicro YM-5201D Power Supply:
| Feature | Detalje |
|---|---|
| Modelnavn | YM-5201D |
| Varemodelnummer | PWS-202-1H |
| Mærke | Supermikro |
| Formfaktor | 1U |
| Output Wattage | 200 watt |
| Connector Type | ATX |
| Kompatible enheder | Desktop Computers, Servers, Desktop Components |
| Afkølingsmetode | Luft |
| Produktmål (L x B x H) | 1.1 x 9.7 x 6.5 tommer |
| Varens vægt | 6.6 pund |
| Dato først tilgængelig | 14. november 2012 |
9. Garanti og support
For garantioplysninger og teknisk support henvises til den officielle Supermicro-brochure. webwebstedet eller kontakt deres kundeservice direkte. Gem din købsbevis til garantikrav.
Supermicro Officiel Webwebsted: www.supermicro.com