Indledning
This manual provides comprehensive instructions for the installation, operation, and maintenance of your Azza XT1 Full Tower Gaming Case (Model: CSAZ-XT1 W). Please read this manual thoroughly before beginning installation to ensure proper setup and to maximize the performance and longevity of your product.
Sikkerhedsoplysninger
Observe the following safety precautions to prevent damage to the case or injury to yourself:
- Afbryd altid strømforsyningen fra stikkontakten, inden du udfører nogen form for installation eller vedligeholdelse.
- Håndter de indvendige komponenter forsigtigt for at undgå skader forårsaget af elektrostatisk udladning (ESD). Overvej at bruge en antistatisk håndledsrem.
- Ensure all cables are routed properly to prevent interference with fans or other moving parts.
- Do not block ventilation openings. Maintain adequate airflow around the case.
- Keep the case away from sources of heat, direct sunlight, and moisture.
Produktegenskaber
The Azza XT1 Full Tower Gaming Case is designed with several features to enhance your computing experience:
- VGA Card Support: Accommodates VGA cards up to 340 mm in length.
- Easy Swap Slot: Features a bottom-mounted easy swap slot for tool-less hard drive installation.
- Køleydelse: Equipped with four pre-installed fans for optimal airflow and supports up to two 120mm water cooling radiators.
- Customizable Grilles: Front and top decorative grilles are removable and exchangeable for aesthetic customization.
- Tool-less Installation: Designed for easy installation of 5.25" devices and HDDs with a tool-less mechanism and a 90-degree rotating HDD holder.
- Kabelstyring: Includes a dedicated compartment for efficient cable routing, improving internal airflow and aesthetics.
Opsætning og installation
Follow these steps to set up your Azza XT1 case and install components:
1. Forbered sagen
Place the case on a stable, flat surface. Remove the side panels by unscrewing the thumb screws at the rear and sliding the panels backward.
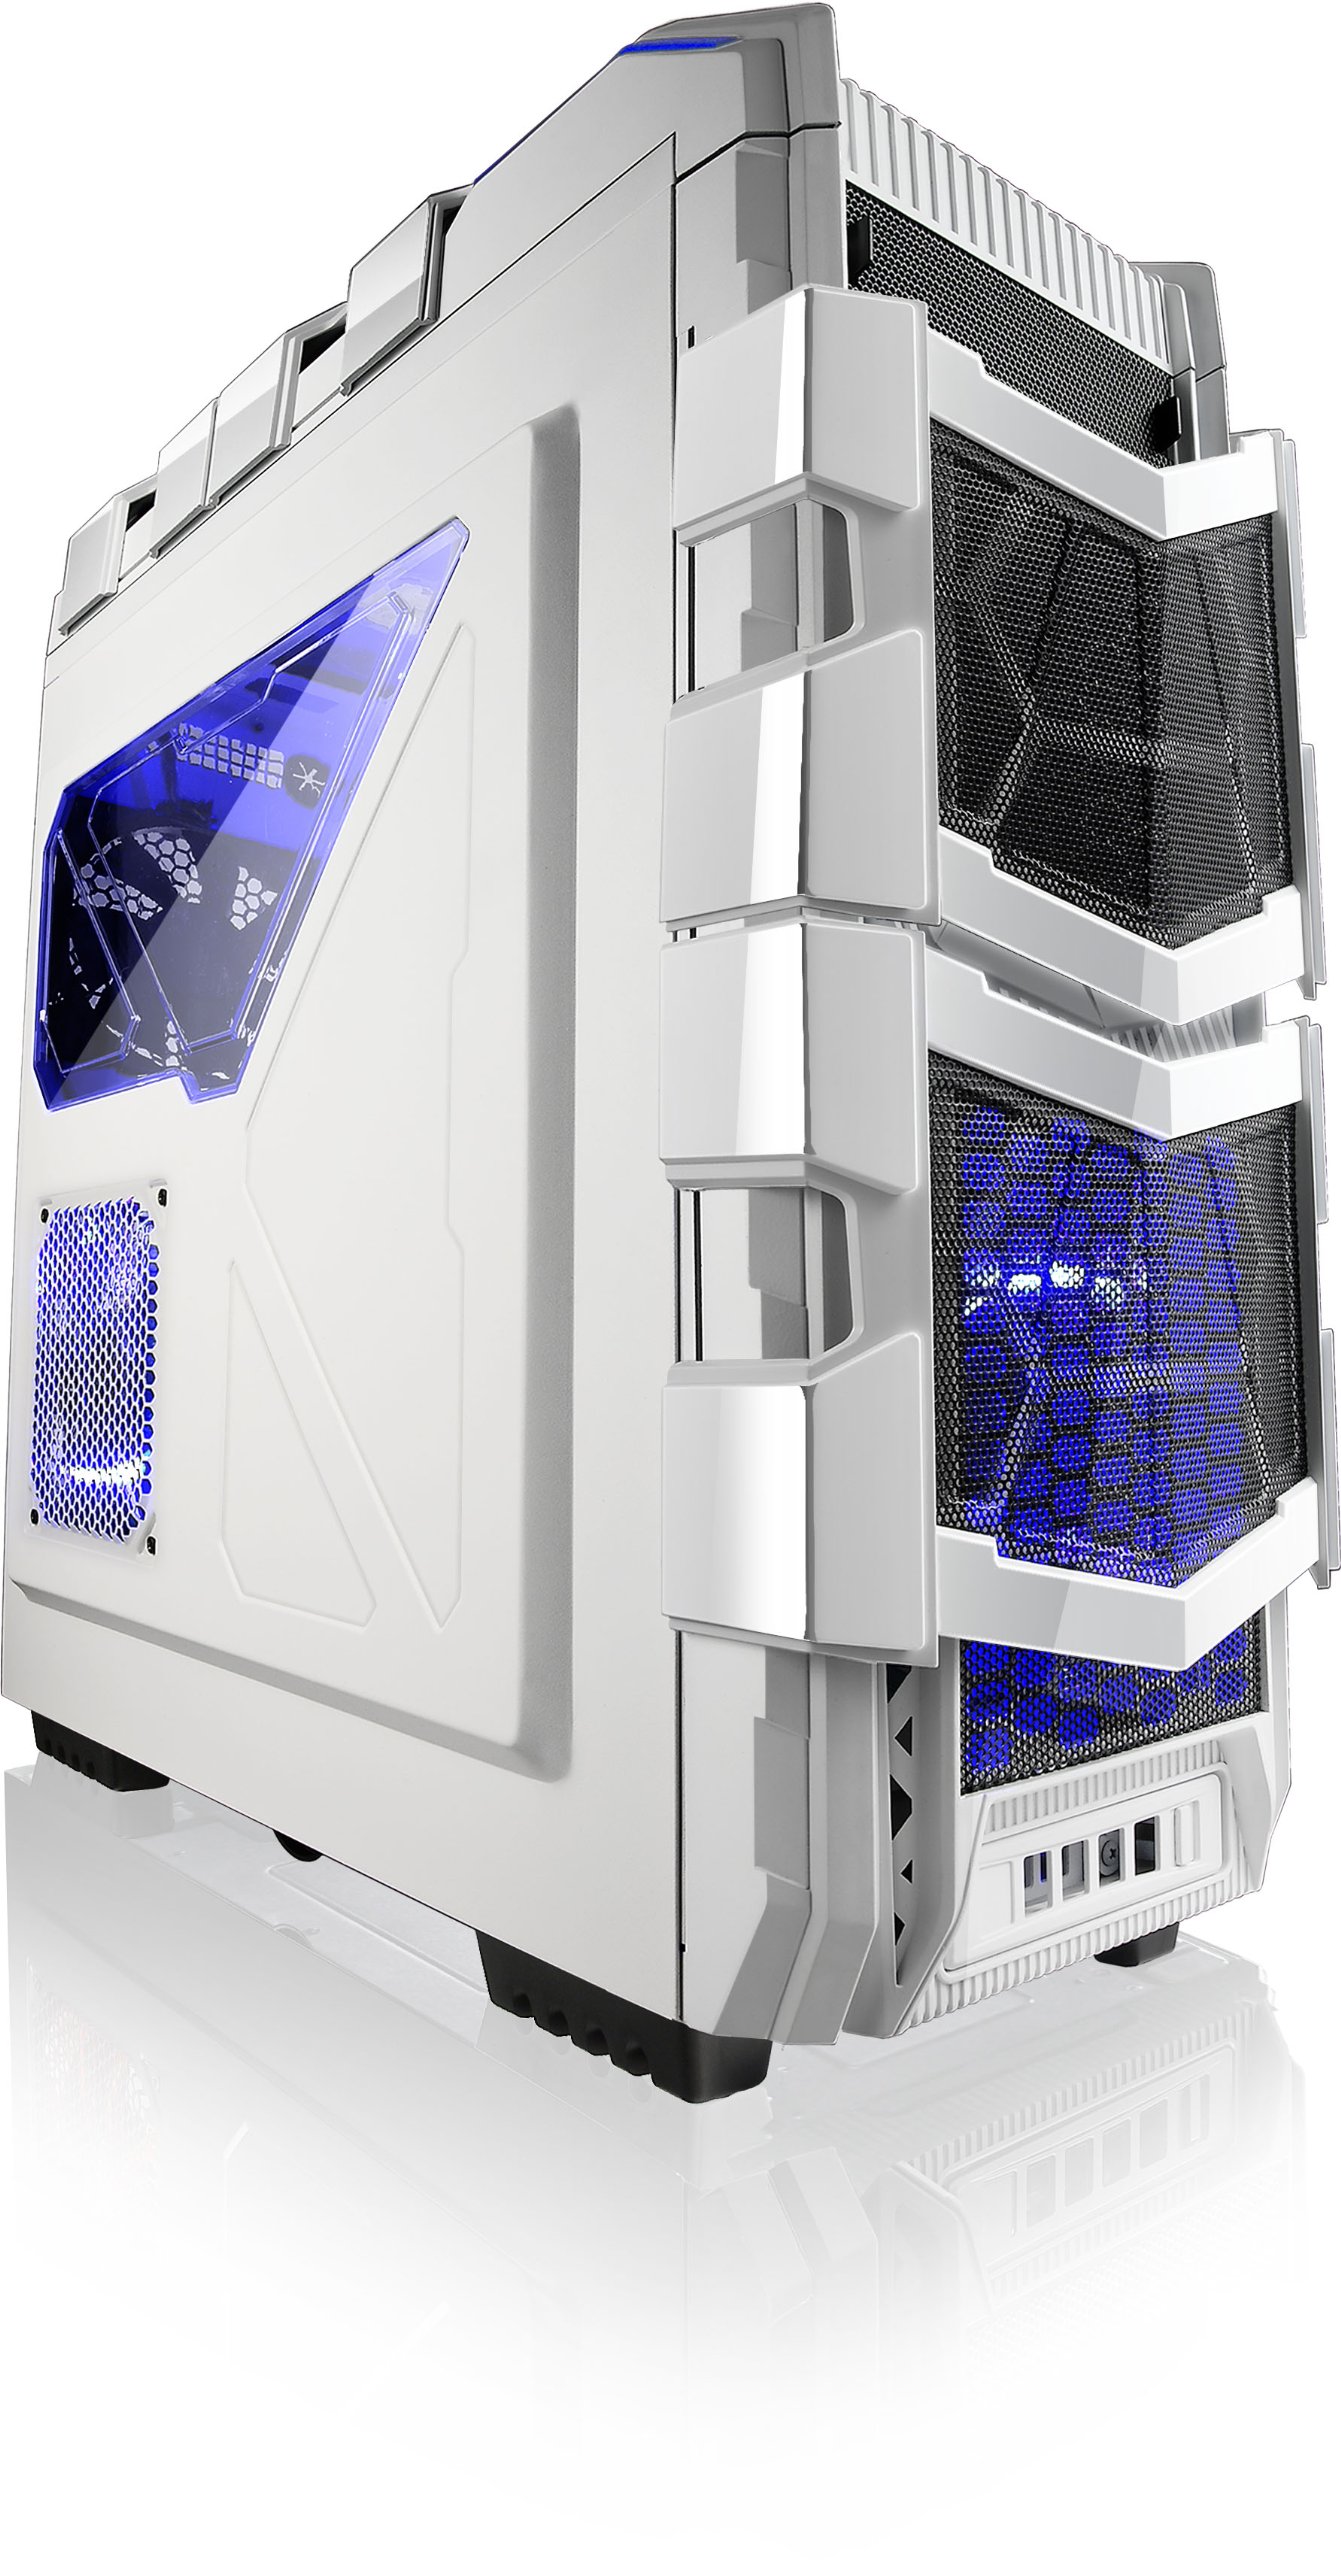
Figur 1: Vinklet view of the Azza XT1 case, showing its overall design and front mesh panels.
2. Installation af bundkort
Install the I/O shield into the rear opening of the case. Align your ATX motherboard with the standoffs inside the case. Secure the motherboard using the provided screws.

Figure 2: Internal layout of the Azza XT1 case, highlighting the motherboard tray and drive bay areas.
3. Installation af strømforsyning
Mount your power supply unit (PSU) into the designated area at the bottom rear of the case. Secure it with screws from the outside.
4. Drevinstallation (HDD/SSD)
Utilize the tool-less HDD holders. For the easy swap slot, simply slide the hard drive into the bottom slot until it clicks into place. For other bays, secure drives using the provided trays or mounting mechanisms. The HDD holder can rotate 90 degrees for easier access.

Figur 3: Bageste indvendige view of the Azza XT1 case, illustrating the drive bays and the space behind the motherboard for cable management.
5. Expansion Card Installation (VGA, etc.)
Remove the necessary expansion slot covers at the rear of the case. Insert your VGA card or other expansion cards into the motherboard's PCIe slots and secure them with screws or the tool-less retention clips.
6. Kabelforvaltning
Route all power and data cables through the designated cutouts and tie-down points behind the motherboard tray. This improves airflow and maintains a clean internal appearance.
7. Luk sagen
Når alle komponenter er installeret, og kablerne er styrt, skal du sætte sidepanelerne på igen og fastgøre dem med fingerskruerne.
Betjening af sagen
The Azza XT1 case provides the housing and cooling for your PC components. Operation primarily involves using the front panel controls:
- Power knap: Located on the top panel, press to power on or off your system.
- Nulstil knap: Located on the top panel, press to restart your system.
- USB-porte: Connect USB devices to the front panel USB 2.0 and USB 3.0 ports.
- Lydstik: Connect headphones and microphones to the front panel audio jacks.

Figur 4: Øverst view of the Azza XT1 case, detailing the power button, USB ports, and audio jacks.
Opretholdelse
Regular maintenance helps ensure optimal performance and longevity of your Azza XT1 case and its components.
- Støvrensning: Rengør støvfiltre og interne komponenter regelmæssigt med trykluft. Sørg for, at systemet er slukket og taget ud af stikket, før rengøring.
- Ventilator inspektion: Check fans for dust buildup and ensure they are spinning freely. Clean as necessary.
- Kabeltjek: Kontroller, at alle interne kabler forbliver sikkert tilsluttet og ikke blokerer luftstrømmen.
- Udvendig rengøring: Tør de udvendige overflader af med en blød, damp klæde. Undgå slibende rengøringsmidler.
Fejlfinding
Dette afsnit omhandler almindelige problemer, du kan støde på med dit pc-kabinet.
| Problem | Mulig årsag | Løsning |
|---|---|---|
| Systemet tænder ikke. | Power button not connected correctly; PSU issue; motherboard issue. | Verify front panel power button cable is securely connected to the motherboard. Check PSU connections. |
| Ventilatorerne drejer ikke. | Fan cables disconnected; fan failure; insufficient power. | Ensure all fan power cables are properly connected to the motherboard or fan controller. |
| USB-portene på frontpanelet virker ikke. | USB header cable disconnected or incorrectly connected. | Check that the USB 2.0 and USB 3.0 header cables from the front panel are correctly plugged into the motherboard. |
| Dårlig luftstrøm eller overophedning. | Dust buildup; blocked vents; improper fan configuration. | Clean dust filters and internal components. Ensure case fans are oriented correctly for optimal airflow. |
Specifikationer
Detailed specifications for the Azza XT1 Full Tower Gaming Case (CSAZ-XT1 W):
| Feature | Detalje |
|---|---|
| Mærke | Azza |
| Modelnummer | CSAZ-XT1 W |
| Sagstype | Fuldtårn |
| Farve | Hvid |
| Materiale | SECC Steel |
| Bundkort kompatibilitet | ATX |
| Produktmål (LxBxH) | 51.56 x 20.57 x 56.64 cm |
| Varens vægt | 9.98 kg |
| USB 2.0 porte | 2 |
| USB 3.0 porte | 1 |
| VGA Card Length Support | Op til 340 mm |
| Vandkølingsstøtte | Up to 2x120mm radiators |
Garanti og support
For warranty information and technical support, please refer to the official Azza webwebstedet eller kontakt deres kundeserviceafdeling. Gem din købskvittering som købsbevis i tilfælde af garantikrav.
Fabrikant: AZZA (USA) Technology Inc