
1. Introduktion
Thank you for choosing the ProMaster FM650 Manual Electronic Flash. This flash unit is designed to provide reliable manual illumination for your photography needs. It is ideal for use with older point-and-shoot cameras or as a versatile slave flash in multi-flash setups. Please read this manual thoroughly before using the flash to ensure proper operation and to maximize its performance.
2. Sikkerhedsforanstaltninger
For at forhindre skader på produktet eller personskade på dig selv eller andre, bedes du overholde følgende sikkerhedsforanstaltninger:
- Do not attempt to disassemble or repair the flash unit yourself. Refer all servicing to qualified personnel.
- Hold blitzenheden tør. Udsæt den ikke for regn, fugt eller høj luftfugtighed.
- Avoid direct eye contact with the flash light, especially at close range, as it can cause temporary vision impairment.
- Use only recommended batteries. Do not mix old and new batteries or different types of batteries.
- Opbevares utilgængeligt for børn.
- Do not operate the flash near flammable gases or liquids.
3. Pakkens indhold
Bekræft at alle varer er til stede i din pakke:
- ProMaster FM650 Manual Electronic Flash Unit
- Instruktionsmanual (dette dokument)
Bemærk: Batterier er ikke inkluderet og skal købes separat.
4. Produktet er slutview
Familiarize yourself with the components of your ProMaster FM650 flash unit:
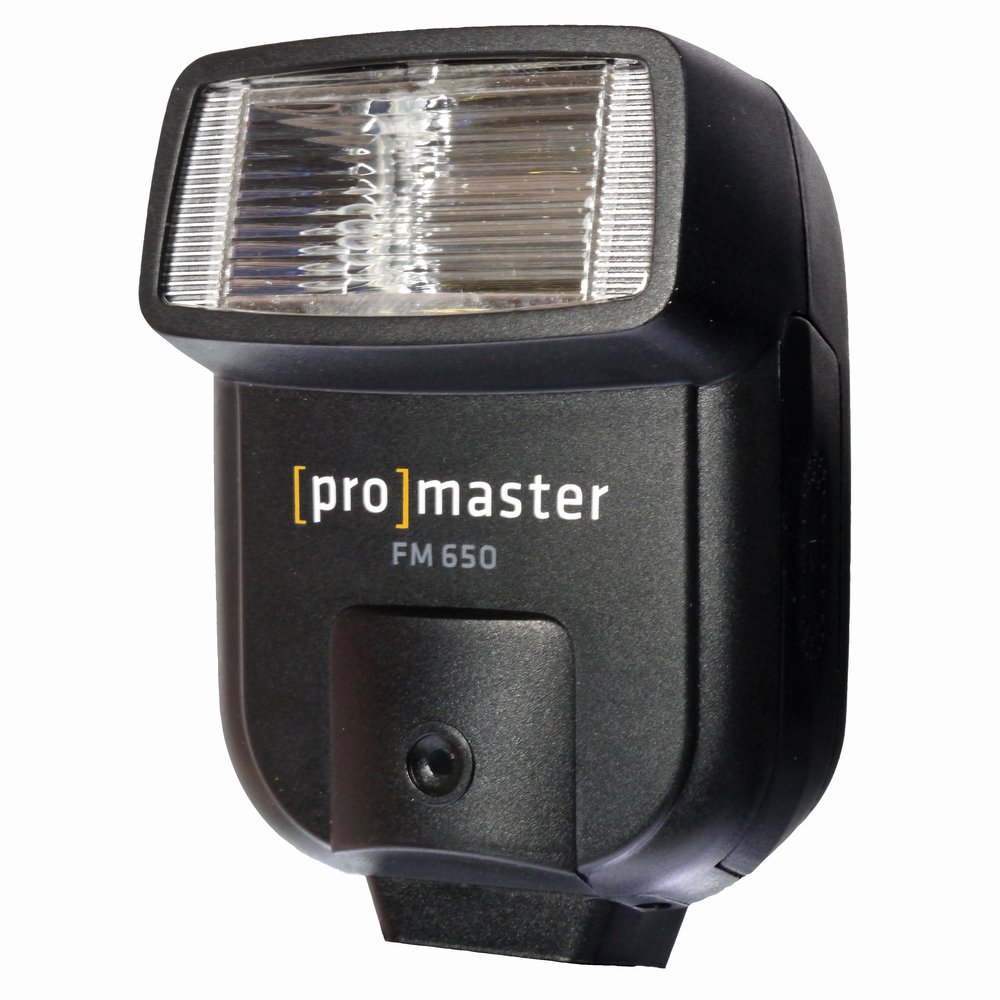
Figur 4.1: ProMaster FM650 Manual Electronic Flash. This image displays the compact design of the flash, featuring the flash tube, optical sensor, and the hot shoe connection point at the base for mounting onto a camera or stand.
- Blitzhoved: Contains the flash tube that emits light.
- Optical Slave Sensor: Detects light from another flash to trigger the FM650 in slave mode.
- Afbryderen: Turns the flash unit on or off.
- Klar lys: Illuminates when the flash is fully charged and ready to fire.
- Hot Shoe-beslag: Connects the flash to a camera's hot shoe or a flash stand.
- Batterirum: Holds the batteries required for operation.
5. Opsætning
5.1 Batteriinstallation
- Ensure the flash unit is turned off.
- Locate the battery compartment cover, usually on the side or back of the unit.
- Open the cover and insert two (2) AA-size alkaline or rechargeable NiMH batteries, observing the correct polarity (+/-) indicated inside the compartment.
- Luk batterirummets dæksel forsvarligt.
5.2 Montering af blitzen
The FM650 can be mounted in two primary ways:
- På kameraet: Slide the hot shoe mount of the flash into your camera's hot shoe. Ensure it is fully seated. Some cameras may have a locking mechanism; if so, secure the flash.
- Uden for kamera: Attach the flash to a compatible light stand or bracket using its hot shoe mount. This is common when using the flash in slave mode.
6. Betjening af blitzen
6.1 Tænd/sluk
Locate the power switch on the flash unit. Slide it to the "ON" position to power on the flash. The ready light will illuminate once the flash is fully charged and ready to fire. Slide the switch to "OFF" when not in use to conserve battery life.
6.2 Manual Mode (On-Camera)
When mounted on a camera's hot shoe, the FM650 operates as a basic manual flash. It will fire simultaneously with your camera's shutter. You will need to adjust your camera's aperture, ISO, and shutter speed settings to achieve the desired exposure. The flash output is fixed, so exposure control is managed entirely through camera settings.
6.3 Slave Mode (Off-Camera)
The FM650 features an optical slave function, allowing it to be triggered wirelessly by another flash. This is useful for multi-flash setups.
- Ensure the flash is powered on and the ready light is illuminated.
- Position the FM650 so its optical slave sensor (usually a small clear or red window on the front) can "see" the light from your main flash unit.
- When your main flash fires, the FM650's optical sensor will detect the light pulse and trigger the FM650 to fire simultaneously.
Note: The FM650 is a basic optical slave and may not distinguish between pre-flashes (used for red-eye reduction or TTL metering) and the main flash. If your main flash uses pre-flashes, the FM650 might fire prematurely. For best results, use a main flash that does not emit pre-flashes, or use the FM650 with a camera that allows for manual flash control without pre-flashes.
7. Vedligeholdelse
7.1 Rengøring
- Tør blitzenheden af med en blød, tør klud.
- For genstridigt snavs, brug en let damp en klud med et mildt rengøringsmiddel, og tør derefter straks af.
- Do not use strong cleaning agents, solvents, or abrasive materials.
- Keep the flash tube and optical sensor clean for optimal performance.
7.2 Opbevaring
- Fjern batterierne, hvis blitzen ikke skal bruges i længere tid, for at forhindre lækage.
- Opbevar blitzen et køligt, tørt sted, væk fra direkte sollys og ekstreme temperaturer.
- Protect the flash from dust and moisture.
8. Fejlfinding
| Problem | Mulig årsag | Løsning |
|---|---|---|
| Blitzen går ikke ud. |
|
|
| Flash fires too early in slave mode. |
|
|
| Flash is too dim/bright. |
|
|
9. Specifikationer
| Model: | ProMaster FM650 |
| Flash Type: | Manual Electronic Flash, Optical Slave |
| Trådløs kommunikation: | Optisk puls |
| Strømkilde: | 2 x AA batterier (medfølger ikke) |
| Produktdimensioner: | 1 x 1 x 1 tommer |
| Varens vægt: | 2 pund |
| Fabrikant: | Promaster |
| ASIN: | B005S0E9U4 |
| UPC: | 029144090906 |
10. Garanti og support
For information regarding warranty coverage, technical support, or service, please refer to the warranty card included with your product or visit the official ProMaster webwebsted. Gem din købskvittering som købsbevis i tilfælde af garantikrav.
ProMaster Official Webwebsted: www.promaster.com (This is a placeholder link as no specific support link was provided in the input data.)