
1. Introduktion
Thank you for choosing the Beurer BM60 Upper Arm Blood Pressure Monitor. This device is designed for fully automatic, non-invasive measurement of arterial blood pressure and pulse rate on the upper arm. It features a patented resting indicator for precise results, a large LCD display, WHO classification, and arrhythmia detection. Please read this manual carefully before first use and keep it for future reference.
Nøglefunktioner:
- Fully automatic blood pressure and pulse measurement on the upper arm.
- Patented resting indicator for accurate measurement results.
- Stort, letlæseligt LCD-display.
- WHO (World Health Organization) classification indicator.
- Arytmidetektion.
- 2 user memory channels with 60 memory spaces each.
- Calculates average of all saved morning and evening measurements for the last 7 days.
- Automatisk sluk-funktion.
- Includes batteries and a storage bag.
2. Sikkerhedsoplysninger
Please observe the following safety instructions to ensure safe and effective use of your blood pressure monitor:
- This device is intended for measuring human arterial blood pressure and pulse rate. It is not intended for use on children.
- Do not attempt to repair the device yourself. Any repairs must be performed by authorized service personnel.
- Consult your doctor before using the device if you have any medical conditions, especially if you have a pacemaker or other implanted devices.
- Do not use the device in areas with high electromagnetic fields, such as near mobile phones or microwave ovens, as this may affect accuracy.
- Measurements taken by yourself are for your information only. Do not alter the dosage of any medicines prescribed by your doctor based on self-measurements.
- Ensure the cuff is applied correctly and comfortably. Over-tightening can cause discomfort or injury.
- Opbevar enheden og dens komponenter utilgængeligt for børn.
3. Produktet er slutview
The Beurer BM60 Blood Pressure Monitor consists of the main unit and an upper arm cuff. Familiarize yourself with the components:

Figure 1: Beurer BM60 Blood Pressure Monitor main unit.

Figure 2: The BM60 monitor connected to its upper arm cuff.

Figur 3: Nærbillede view of the M1, Power, and M2 buttons on the monitor.

Figure 4: The LCD display showing systolic, diastolic, pulse, and memory indicators.
4. Opsætning
4.1 Batteriinstallation
- Åbn batterirummets dæksel på bagsiden af enheden.
- Insert four (4) AA 1.5V batteries, ensuring correct polarity (+/-).
- Luk batterirummets dæksel forsvarligt.
- The low battery indicator will appear on the display when batteries need replacement.
4.2 Tilslutning af manchetten
- Insert the air tube connector from the cuff firmly into the port on the left side of the monitor unit.
- Sørg for, at forbindelsen er sikker for at forhindre luftlækage under målingen.
4.3 Påsætning af manchetten
The standard cuff is suitable for upper arm circumferences of 23-35 cm. An optional XL cuff (30-42 cm) is available separately.
- Place the cuff on your bare upper left arm, approximately 2-3 cm above the elbow joint. The air tube should run along the inside of your arm.
- Ensure the cuff is snug but not too tight. You should be able to fit two fingers under the cuff.
- The arrow on the cuff should point towards your hand.

Figure 5: Correct placement of the cuff on the upper arm.
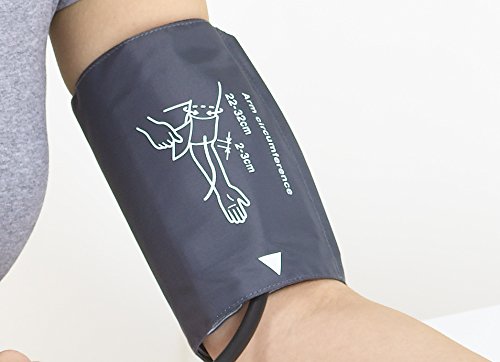
Figure 6: Detail of the cuff showing the arm circumference guide (22-32cm in this example, actual cuff is 23-35cm).
5. Betjeningsvejledning
5.1 Før måling
- Hvil i mindst 5 minutter, før du foretager en måling.
- Avoid eating, drinking alcohol, smoking, or exercising for at least 30 minutes prior to measurement.
- Sit in a relaxed position with your back supported and feet flat on the floor. Your arm should be resting on a table so the cuff is at heart level.
- Forbliv stille og tavs under målingen.
5.2 Tage en måling
- Tryk på ON/OFF knap (I) for at starte målingen.
- The cuff will automatically inflate, and the measurement will begin.
- During the measurement, the device will display a patented resting indicator. This indicates whether your circulatory system is sufficiently at rest for an accurate reading.
- Once the measurement is complete, the systolic pressure, diastolic pressure, and pulse rate will be displayed on the LCD screen.
- The results will also be classified according to WHO guidelines and checked for arrhythmia.
- The device automatically stores the measurement in the selected user memory (M1 or M2).
- The device will automatically switch off after approximately one minute of inactivity.
5.3 Hukommelsesfunktioner
The BM60 has two user memory channels (M1 and M2), each capable of storing 60 measurements.
- Selecting a User: Before starting a measurement, press the M1 or M2 knap for at vælge den ønskede brugerprofilfile.
- Viewing Stored Measurements: Når enheden er slukket, skal du trykke på M1 or M2 knap til view the stored measurements for that user. Repeated presses will cycle through the readings.
- 7-Day Average: The device can display an average of all saved morning and evening readings taken over the last 7 days for each user. Refer to the full user manual for specific instructions on accessing this feature.
6. Vedligeholdelse
6.1 Rengøring
- Clean the monitor unit and cuff with a slightly damp klæde. Brug ikke slibende rengøringsmidler eller nedsænk enheden i vand.
- Vask ikke manchetten.
6.2 Opbevaring
- Opbevar enheden i den medfølgende opbevaringstaske, når den ikke er i brug.
- Opbevar enheden et køligt, tørt sted, væk fra direkte sollys og ekstreme temperaturer.
- Fjern batterierne, hvis enheden ikke skal bruges i en længere periode.
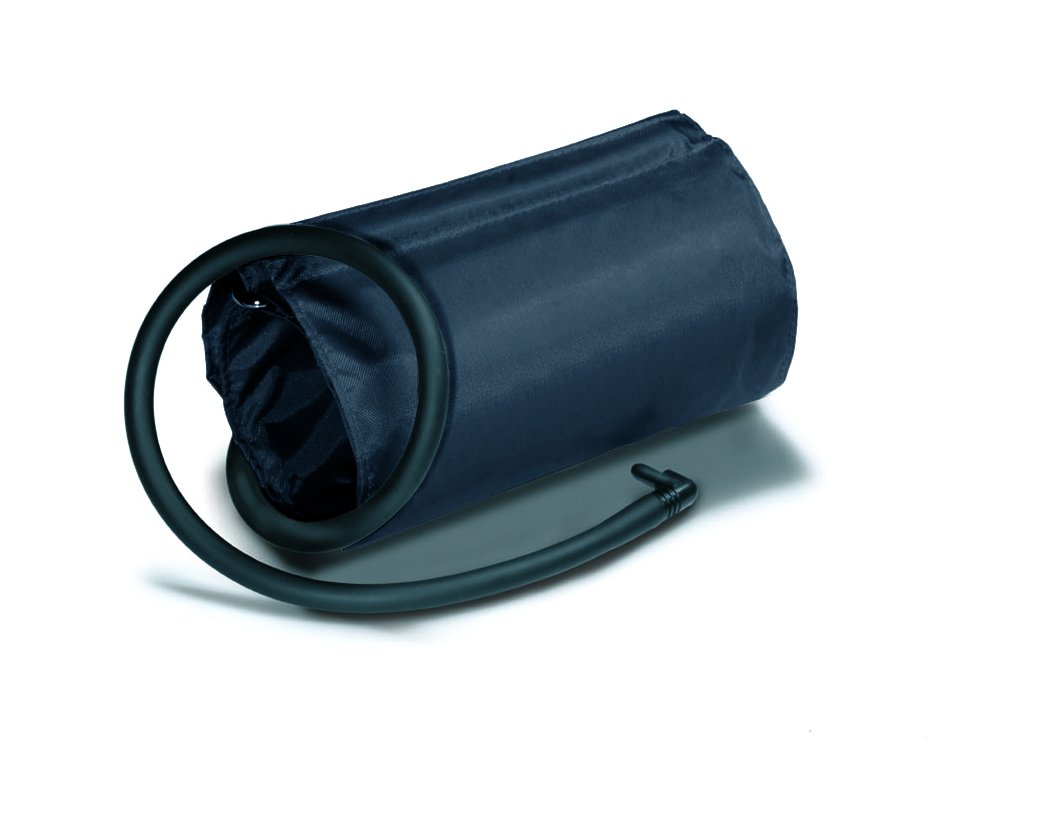
Figure 7: The cuff can be rolled up for compact storage in the included bag.
7. Fejlfinding
If you encounter issues with your Beurer BM60, refer to the table below for common problems and solutions:
| Problem | Mulig årsag | Løsning |
|---|---|---|
| Enheden tændes ikke. | Batterierne er opbrugt eller isat forkert. | Kontroller batteripolariteten. Udskift med nye AA-batterier. |
| Fejlmeddelelse på displayet. | Manchetten er ikke påsat korrekt, der er bevæget sig under måling, eller der er luftlækage. | Re-apply cuff correctly. Remain still and silent. Check cuff connection. |
| Inkonsekvente aflæsninger. | Not resting sufficiently before measurement, incorrect cuff placement, or external factors. | Ensure 5 minutes of rest. Verify cuff placement. Avoid talking or moving. |
| Manchetten pustes ikke op. | Cuff air tube is disconnected or damaged. | Check that the air tube is securely connected to the monitor. Inspect for damage. |
If the problem persists, contact Beurer customer support or your local service center.
8. Specifikationer
| Feature | Specifikation |
|---|---|
| Modelnummer | 655.15 |
| Målemetode | Oscillometric, non-invasive upper arm measurement |
| Strømkilde | 4 x 1.5V AA batteries (included) or optional mains adapter |
| Manchet omkreds | 23 - 35 cm (standard), 30 - 42 cm (optional XL cuff) |
| Hukommelse | 2 users x 60 memory spaces |
| Display Type | LCD |
| Produktmål (L x B x H) | 10 x 13 x 4 cm |
| Varens vægt | 606 g (ca.) |
| Automatisk sluk | Ja |
9. Garanti og support
9.1 Garanti
The Beurer BM60 Blood Pressure Monitor comes with a 1-year manufacturer's warranty from the date of purchase. Please retain your proof of purchase for warranty claims. The warranty covers defects in materials and workmanship under normal use.
9.2 Kundesupport
For technical assistance, troubleshooting beyond this manual, or warranty inquiries, please contact Beurer customer support. Contact information can typically be found on the Beurer official webwebstedet eller på produktemballagen.