Progress Lighting P3689-44
Progress Lighting P3689-44 Two-Light Close-to-Ceiling Fixture Instruction Manual
Indledning
This manual provides detailed instructions for the safe installation, operation, and maintenance of your Progress Lighting P3689-44 Two-Light Close-to-Ceiling Fixture. Please read all instructions carefully before beginning installation and retain this manual for future reference.
The P3689-44 fixture features a clean design with elegant lines, complemented by a satin Oxford Silver finish and an etched alabaster style glass shade. Its unique twist-lock shade design allows for easy access for changing light bulbs without external hardware.
Sikkerhedsoplysninger
ADVARSEL: Risiko for elektrisk stød. Afbryd strømmen til sikringsboksen eller afbryderen før installation eller service.
FORSIGTIGHED: For your safety, read and understand the information provided in this manual completely before attempting to assemble, install, or operate this product. Failure to do so could lead to electric shock, fire, or other injuries that could be hazardous or even fatal.
- Alle elektriske forbindelser skal være i overensstemmelse med lokale forskrifter, forordninger eller National Electric Code (NEC).
- Kontakt en kvalificeret elektriker, hvis du er usikker på ledningsføringsprocedurerne.
- Brug kun UL/cUL-godkendte ledningsforbindelser.
- Overskrid ikke det maksimale wattage specificeret for pærerne.
- Sørg for, at armaturet er sikkert monteret på et strukturelt element i loftet.
Pakkens indhold
Carefully unpack your fixture and check that all parts are included. If any parts are missing or damaged, contact Progress Lighting customer service before proceeding.
- Armaturhus (1)
- Glasskærm (1)
- Mounting hardware kit (1)
- Brugsanvisning (1)
Opsætning og installation
Nødvendige værktøjer (ikke inkluderet):
- Stjerneskruetrækker
- Flad skruetrækker
- Afisoleringstænger
- Elektrisk tape
- Sikkerhedsbriller
Installationstrin:
- Sluk for strømmen: Before starting installation, ensure the power to the circuit is turned off at the main fuse box or circuit breaker.
- Forbered montering: Attach the mounting bracket to the junction box in the ceiling using the screws provided in the hardware kit. Ensure the bracket is securely fastened.
- Ledningsføring: Tilslut armaturets ledninger til husets ledninger i henhold til følgende:
- Tilslut sort armaturledning til sort (hot) house wire.
- Tilslut hvid armaturledning til hvid (neutral) husledning.
- Tilslut bart kobber (ground) fixture wire to the grønt eller bart kobber (ground) house wire.
- Mount fixture body: Carefully push the wired fixture body up to the ceiling, aligning the screw holes on the fixture with the screws on the mounting bracket. Secure the fixture body in place with the decorative nuts or screws provided.
- Installer pærer: Insert two (2) 60-watt maximum medium base bulbs (not included) into the sockets. Do not exceed the recommended wattage.
- Attach glass shade: Align the glass shade with the fixture body and twist it clockwise until it locks securely into place. The unique twist-lock design ensures the shade is held firmly without visible hardware.
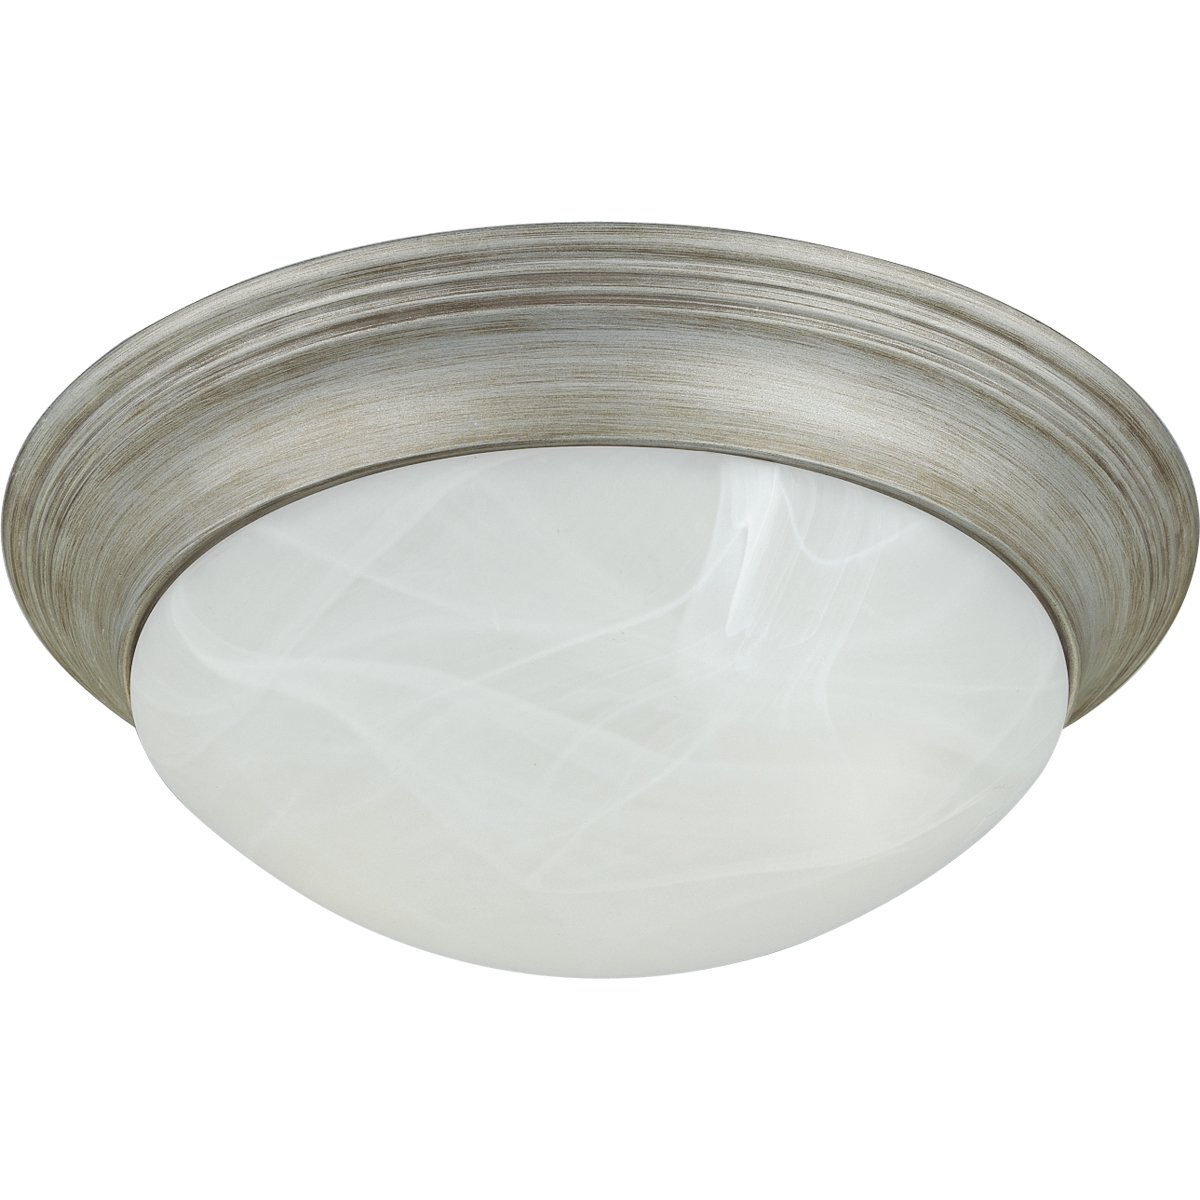
Image: The Progress Lighting P3689-44 Two-Light Close-to-Ceiling Fixture, showcasing its Oxford Silver finish and etched alabaster style glass shade. The fixture is designed for flush mounting to the ceiling.
Betjeningsvejledning
Once the fixture is fully installed and bulbs are in place, restore power at the main fuse box or circuit breaker. The fixture is operated via a standard wall switch (not included) connected to the circuit.
- Sørg for det korrekte wattage bulbs (max 60-watt medium base) are used to prevent overheating or damage.
- The fixture is designed for indoor use in dry locations only.
Opretholdelse
Rensning:
To clean the fixture, ensure power is turned off. Wipe the fixture with a soft, dry cloth. Do not use abrasive cleaners, polishes, or solvents as they may damage the finish or glass. For the glass shade, a mild glass cleaner can be used sparingly on a cloth, then wiped dry.
Udskiftning af pære:
To replace bulbs, turn off power at the circuit breaker. Gently twist the glass shade counter-clockwise to remove it. Unscrew the old bulbs and replace them with new 60-watt maximum medium base bulbs. Reattach the glass shade by twisting it clockwise until secure.
Fejlfinding
| Problem | Mulig årsag | Løsning |
|---|---|---|
| Lyset tændes ikke. |
|
|
| Lyse flimrer. |
|
|
Specifikationer
| Feature | Detalje |
|---|---|
| Modelnummer | P3689-44 |
| Mærke | Fremskridtsbelysning |
| Slutte | Oxford Silver |
| Type glas | Etched Alabaster Style Glass |
| Dimensioner (Bredde x Højde) | 14 inches (W) x 4-3/4 inches (H) |
| Antal lys | 2 |
| Pære type | Medium base (E26) |
| Max Wattage pr. pære | 60 watt |
| Voltage | 120 volt |
| Strømkilde | Elektrisk med ledning |
| Materiale | Glas, Metal |
| UPC | 785247368921 |
Garanti og support
Denne Progress Lighting-armatur er dækket af en 1 års producentgaranti fra købsdatoen. Denne garanti dækker fejl i materialer og udførelse ved normal brug.
For warranty claims, technical support, or replacement parts, please contact Progress Lighting customer service. Keep your purchase receipt as proof of purchase.
Progress Lighting Customer Service: Se den officielle Progress Lighting-fortegnelse. webwebstedet eller produktemballagen for aktuelle kontaktoplysninger.