
Møn 63170
Moen M-Pact Posi-Temp Pressure-Balancing Rough-In Valve
Model: 63170
Indledning
This manual provides essential information for the installation, operation, and maintenance of your Moen M-Pact Posi-Temp Pressure-Balancing Rough-In Valve, Model 63170. The M-Pact Common Valve System is designed to simplify future upgrades, allowing you to change the trim style or finish of your faucet without altering the in-wall plumbing. This system ensures consistent water temperature and pressure, enhancing your showering or bathing experience.
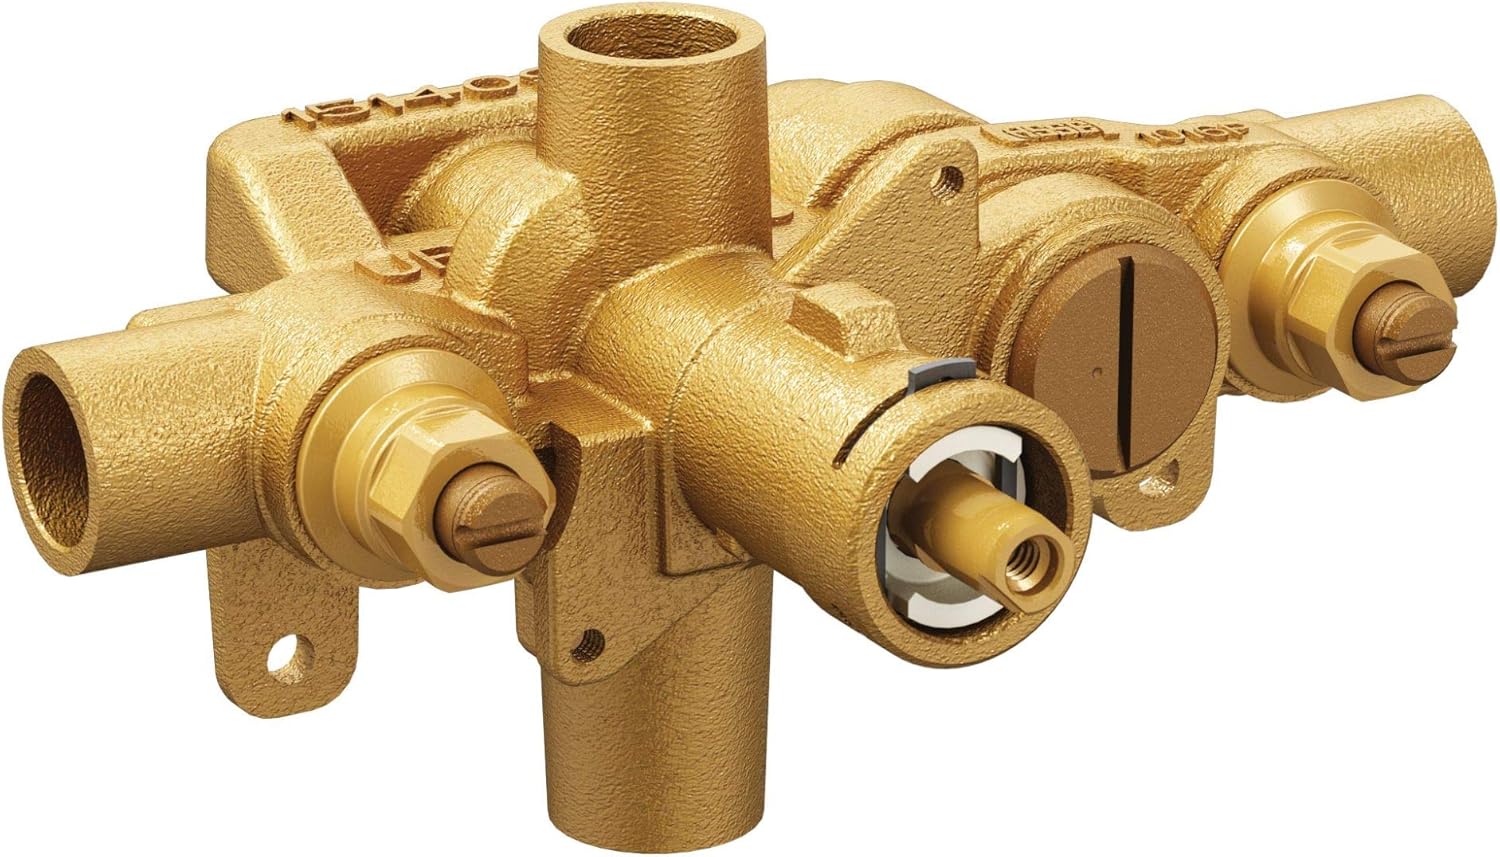
Image: The Moen 63170 M-Pact Posi-Temp Rough-In Valve, showcasing its brass construction and multiple connection points for water supply and output.
Sikkerhedsoplysninger
Læs venligst alle instruktioner omhyggeligt, inden installationen påbegyndes. Manglende overholdelse af disse instruktioner kan resultere i materielle skader eller personskade.
- Always turn off the main water supply before installing or servicing the valve.
- Brug passende personlige værnemidler (PPE), såsom sikkerhedsbriller og handsker, under installationen.
- If you are unsure about any part of the installation process, consult a qualified plumbing professional.
- Ensure all local plumbing codes are met during installation.
Nødvendige komponenter og værktøjer
Inkluderede komponenter:
- Moen M-Pact Posi-Temp Rough-In Valve (Model 63170)
- Protective plaster ground (white cover)
- Installation hardware (screws, mounting bracket)
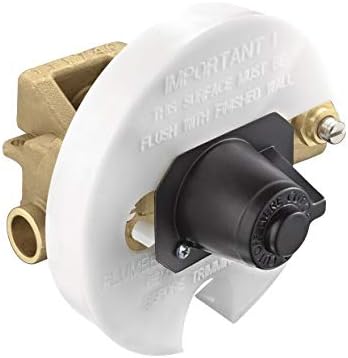
Image: The Moen 63170 valve shown with its white protective plaster ground, which helps protect the valve during wall finishing and indicates the proper depth for installation.
Værktøjer du kan få brug for:
- Rørskærer eller hacksav
- Målebånd
- Niveau
- Skruetrækker (Phillips og/eller flad)
- Justerbar skruenøgle
- Soldering torch and solder (for copper connections) or appropriate tools for CPVC/PEX connections
- Gevindforseglingstape (teflontape)
Installation
This section outlines the general steps for installing the Moen M-Pact Rough-In Valve. Refer to the detailed instructions included with your specific valve packaging for precise measurements and connection methods.
- Forbered installationsområdet:
- Turn off the main water supply to the house.
- Remove any existing fixtures and clear the wall cavity where the valve will be installed.
- Sørg for, at monteringsfladen er ren og stabil.
- Monter ventilen:
- Position the valve in the wall cavity, ensuring it is level and at the correct depth relative to the finished wall surface. The protective plaster ground should be flush with the finished wall.
- Secure the valve to the framing using appropriate screws through the mounting tabs.
- Tilslut vandledninger:
- Connect the hot water supply line to the port marked "H" (Hot).
- Connect the cold water supply line to the port marked "C" (Cold).
- Connect the shower outlet line to the top port.
- Connect the tub spout outlet line to the bottom port (if applicable).
- Ensure all connections are secure and leak-free. The valve supports 1/2" connections and is compatible with CPVC.
- Test for lækager:
- Tænd langsomt for hovedvandforsyningen.
- Inspect all connections for any signs of leaks. Tighten connections as necessary.
- Installer trimsæt:
- Once the wall is finished, remove the protective plaster ground.
- Install your chosen Moen M-Pact compatible trim kit according to its specific instructions. This typically involves installing the cartridge, handle, and escutcheon plate.
Operation
The Moen M-Pact Posi-Temp Rough-In Valve works in conjunction with a Moen Posi-Temp trim kit (sold separately) to control water flow and temperature. The pressure-balancing mechanism maintains water temperature within a safe range, even when other water sources in your home are used, preventing sudden temperature changes.
- Temperaturkontrol: The single handle of your trim kit rotates to control the water temperature.
- Flow kontrol: The handle also controls the water flow, turning it on and off.
- Trykbalancering: The internal cartridge automatically adjusts water pressure to maintain a consistent temperature, protecting against scalding or thermal shock.
Opretholdelse
Proper maintenance will ensure the longevity and optimal performance of your Moen valve.
- Regelmæssig inspektion: Periodically check for any signs of leaks around the valve body or connections. Address any leaks promptly.
- Udskiftning af patron: While designed for durability, the Posi-Temp cartridge may eventually require replacement due to wear or mineral buildup. Moen Posi-Temp cartridges are designed for easy replacement without needing to access the in-wall plumbing. Refer to your trim kit's manual for specific cartridge replacement instructions.
- Rensning: Keep the exposed trim clean using a soft cloth and mild soap. Avoid abrasive cleaners or harsh chemicals, as they can damage the finish.
Fejlfinding
If you encounter issues with your Moen M-Pact Posi-Temp valve, refer to the common problems and solutions below. For more complex issues, contact Moen customer support.
| Problem | Mulig årsag | Løsning |
|---|---|---|
| Ingen vandgennemstrømning eller lavt tryk. | Main water supply off; clogged cartridge; debris in lines. | Check main water supply; clean or replace cartridge; flush water lines. |
| Vandtemperaturen svinger. | Posi-Temp cartridge issue; hot/cold lines reversed. | Inspect or replace Posi-Temp cartridge; verify hot and cold connections. |
| Leaking from valve body or connections. | Loose connections; damaged O-rings or seals; cracked valve body. | Tighten connections; replace O-rings/seals; if valve body is cracked, replacement is necessary. |
Specifikationer
| Feature | Detalje |
|---|---|
| Modelnummer | 63170 |
| Mærke | Møn |
| Materiale | CPVC (Valve body is brass) |
| Indløbstilslutningsstørrelse | 0.5 tommer |
| Indløbsforbindelsestype | Compression (CC) |
| Udgangstilslutningstype | Compression (CC) |
| Antal havne | 4 |
| Ventil type | Pressure-Balancing (Posi-Temp) |
| Specifikation Met | ASSE |
| Varens vægt | 1.83 pund |
| Produktmål (L x B x H) | 18.62 x 13.12 x 12.25 tommer |
Garanti og support
Moen products are manufactured with the highest standards of quality and workmanship. Moen offers a Limited Lifetime Warranty against leaks, drips, and finish defects to the original consumer purchaser. For full warranty details, product registration, or technical support, please visit the official Moen webwebsted eller kontakt deres kundeserviceafdeling.
Moen Officiel Webwebsted: www.moen.com
Kundeservice: Henvis til Møen website for current contact information (phone numbers, chat, email).
Ask a question about this manual
Ask about setup, troubleshooting, compatibility, parts, safety, or missing instructions. Manuals+ will review the question and use this page’s manual context to help answer it.