
Indledning
This manual provides comprehensive instructions for the installation, operation, maintenance, and troubleshooting of your Moen Waterhill Two-Handle Traditional Bridge Kitchen Faucet with Side Sprayer. Designed for durability and ease of use, this faucet enhances your kitchen with its intricate charm and functional features. Please read this manual thoroughly before beginning installation or operation to ensure proper function and longevity of your product.
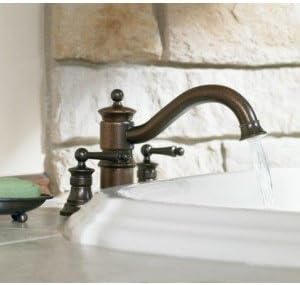
Image: Moen Waterhill Kitchen Faucet in Oil Rubbed Bronze finish, showcasing its traditional bridge design and side sprayer, installed in a kitchen setting.
Opsætning og installation
Proper installation is crucial for the optimal performance of your Moen Waterhill faucet. While professional installation is recommended, this section outlines the general steps involved. Always ensure the main water supply is shut off before beginning any work.
Forberedelse
- Sluk for vandforsyningen: Locate and turn off the main water supply valve to your home or the specific shut-off valves under the sink.
- Aflast vandtrykket: Open the existing faucet handles to drain any remaining water from the lines and relieve pressure.
- Saml værktøjer: Ensure you have the necessary tools: Phillips screwdriver, Hex or Allen wrench (often included with the faucet), adjustable pliers, and safety glasses (if desired).
Installationstrin (generelt overview)
This faucet is designed for installation through four 1-inch diameter holes (4 inches on the center), and it can also be mounted without the side spray and center escutcheon (two-hole mount with 8-inch centers).
- Mount Faucet Body: Secure the main faucet body to the sink or countertop using the provided mounting hardware.
- Tilslut vandledninger: Attach the hot and cold water supply lines to the corresponding connections on the faucet body. Ensure all connections are tight to prevent leaks.
- Installer sidesprøjte: If using, install the side sprayer into its designated hole and connect its hose to the faucet's quick connect system (Hydrolock).
- Installer håndtag: Place the lever handles onto their respective valve stems. Secure them by tightening the set screws, typically located on the underside or back of the handle.
- Test for lækager: Slowly turn on the main water supply and check all connections for any signs of leaks. Operate both hot and cold water to ensure proper flow.

Image: Detailed diagram illustrating the spout height (11.47 inches) and spout reach (9.38 inches) of the Moen Waterhill Kitchen Faucet, crucial for installation planning.
Betjeningsvejledning
Your Moen Waterhill faucet is designed for intuitive operation, providing precise control over water flow and temperature.
- Vandgennemstrømning og temperatur: The two-handle lever design allows for easy adjustment. Rotate the hot water handle (typically on the left) counter-clockwise to increase flow and the cold water handle (typically on the right) clockwise to increase flow.
- Højbuetud: The high arc spout provides ample height and reach, making it convenient to fill or clean large pots and pans.
- Sidesprøjte: The single-function side spray offers convenient, flexible cleaning. Simply lift the sprayer from its holder and press the lever to activate water flow.
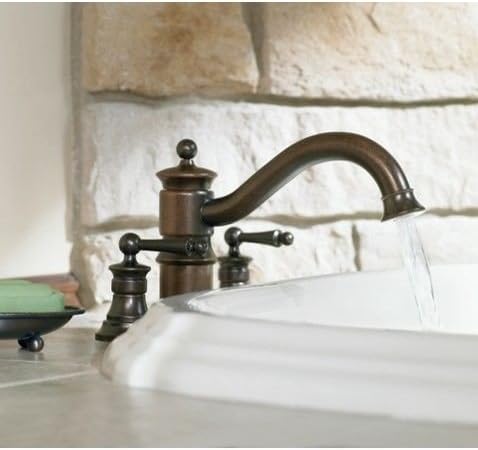
Billede: Et nærbillede view of the Moen Waterhill Kitchen Faucet in Oil Rubbed Bronze, demonstrating water flow from the high-arc spout.
Opretholdelse
Regular maintenance will help preserve the finish and functionality of your Moen Waterhill faucet.
- Rensning: Clean the faucet regularly with a soft cloth and mild soap. Avoid abrasive cleaners, polishes, or harsh chemicals, as these can damage the finish.
- Udskiftning af patron: If you experience issues with water flow or temperature control, the 1224 cartridge may need replacement. This involves:
- Shutting off the water supply.
- Removing the handle by unthreading the set screw.
- Removing the cartridge nut using adjustable pliers.
- Pulling out the old cartridge.
- Inserting the new 1224 cartridge, ensuring the tab aligns with the valve's notch.
- Tightening the cartridge nut by hand, then securing it with an adjustable wrench.
- Reinstalling the handle.
Note: A detailed visual guide for cartridge replacement is available from Moen's official resources.
- Rengøring af belufteren: If water flow is reduced, the aerator at the end of the spout may be clogged. Unscrew the aerator, clean any debris, and reattach it.
Fejlfinding
Se tabellen nedenfor for almindelige problemer og deres løsninger.
| Problem | Mulig årsag | Løsning |
|---|---|---|
| Lav vandgennemstrømning | Tilstoppet perlator; delvist lukket afspærringsventil; snavs i vandledninger. | Clean or replace aerator. Ensure shut-off valves are fully open. Flush water lines. |
| Lækage fra tud | Slidt patron; snavs i patronen. | Udskift 1224-patronen. |
| Lækage fra håndtagsbasen | Loose cartridge nut; worn O-rings on cartridge. | Tighten cartridge nut. Replace the 1224 cartridge. |
| Vanskeligheder med at justere temperaturen | Defekt patron. | Udskift 1224-patronen. |
Specifikationer
- Mærke: Møn
- Modelnavn: Waterhill
- Modelnummer: S713ORB
- Udfør type: Olie gnidet bronze
- Materiale: Bronze
- Antal håndtag: 2
- Antal huller: 2 or 4 (with escutcheon)
- Maksimal gennemstrømningshastighed: 1.5 gallon pr. Minut
- Tudhøjde: 11.47 tommer
- Udløbsrækkevidde: 9.38 tommer
- Varens vægt: 11 pund
- Produktdimensioner: 9.38 x 14.63 x 11.47 tommer
- UPC: 026508144404
Garantioplysninger
Moen offers a Begrænset livstidsgaranti against leaks, drips, and finish defects for the original consumer purchaser. For detailed warranty terms and conditions, please refer to the official Moen webwebsted eller kontakt kundesupport.
Støtte
For further assistance, product information, or to purchase replacement parts, please contact Moen Consumer Services:
- Telefon: 1-800-BUY-MOEN (1-800-289-6636)
- Webwebsted: Besøg Moen-butikken på Amazon